• Skip to primary navigation
  • Skip to main content
  • Skip to footer

Nick, & Cindy Davis

MENUMENU
  • Home
  • Blog
  • Contact Us
    • Nick Davis
      • Contact Me
      • (813) 300-7116
    • Cindy Davis
      • Contact Me
      • (813) 695-6475
  • Find Your Home
        • Popular Searches
          • Advanced Search
          • Anna Maria
          • Community Videos
          • Crystal Lagoon
          • Fishhawk Ranch
          • Foreclosures
          • Golf Course
          • Horse Homes
          • In Law Suite
          • Luxury Homes
          • Mirada Community
          • Sarasota Homes
          • Vintage Homes
          • Waterfront Homes
        • Hillsborough
          • 5 + Acre Homes
          • 55+ Communities
          • Community Videos
          • County Crime Map
          • All Homes
          • New Construction
          • Search By Schools
          • Search by Zip
          • Vacant Land
          • Waterfront Properties
        • Pasco
          • 5 + Acre Homes
          • 55+ Communities
          • Community Videos
          • County Crime Map
          • All Homes
          • New Construction
          • Search By Schools
          • Search by Zip
          • Vacant Land
          • Waterfront Properties
        • Pinellas
          • 5 + Acre Homes
          • 55+ Communities
          • All Homes
          • County Crime Map
          • New Construction
          • Search by Zip
          • Vacant Land
          • Waterfront Properties
  • Map Searches
    • Hillsbourgh
      • Apollo Beach
      • Avila
      • Basset Creek
      • Brandon
      • Cross Creek
      • Seffner
      • Cheval
      • Cordoba
      • Gibsonton
      • K-Bar Ranch
      • Keystone
      • Lithia
      • Lutz
      • Odessa
      • Plant City
      • Riverview
      • Ruskin
      • Temple Terrace
      • Thonotosassa
      • Valrico
      • Waterfront Homes
      • Wimauma
    • Pasco
      • Dade City
      • Gulf Harbors
      • Homesteads
      • Land O Lakes
      • Estancia
      • Hudson
      • Meadow Pointe
      • Ridge at Wiregrass
      • Ridge Manor
      • San Antonio
      • Seven Oaks
      • Seven Springs
      • Spring Hill
      • Starkey Ranch
      • Trilby
      • Trinity
      • Waterfront Homes
      • Watergrass
      • Wesley Chapel
      • Zephyrhills
    • Pinellas
      • Clearwater
      • Crystal Beach
      • Dunedin
      • Gulfport
      • Holiday
      • Indian Rocks Beach
      • Largo
      • Madeira Beach
      • Oldsmar
      • Palm Harbor
      • Pinellas Park
      • Redington Shores
      • Safety Harbor
      • Seminole
      • ST Petersburg
      • Waterfront Homes
      • Tarpon Springs
      • Tierra Verde
      • Treasure Island
  • Neighborhoods
        • Hillsborough
          • Apollo Beach
          • Brandon
          • Keystone
          • Lithia
          • Lutz
          • New Tampa
          • Odessa
          • Seminole Heights
          • Plant City
          • South Tampa
          • Stonelake Ranch
          • Riverview
          • Ruskin
          • Valrico
          • Tampa
          • Temple Terrace
          • Westchase
          • Westshore Yacht Club
            • Inlet Park Community
        • Pasco
          • Bayonet Point
          • Dade City
          • Bexley Ranch
          • Holiday
          • Gulf Harbors
          • Hudson
          • Land O Lakes
          • New Port Richey
          • Ridge Manor
          • San Antonio
          • Spring Hill
          • Starkey Ranch
          • Trinity
          • Wesley Chapel
          • Zephyrhills
        • Pinellas
          • Belleair Beach
          • Clearwater
          • Dunedin
          • Gulfport
          • Indian Rocks
          • Largo
          • Madeira Beach
          • Oldsmar
          • Palm Harbor
          • Pinellas Park
          • Redington Beach
          • Seminole
          • Snell Isle
          • Shore Acres
          • ST Petersburg
          • Tarpon Springs
  • Resources
    • APPS / Videos
      • Community Videos
      • MY MLS APP-Mobile
      • RE/MAX Mobile APP
      • Real Estate Videos
    • School Information
      • Hernando County
      • Hillsborough County
      • Pasco County
      • Pinellas County
    • Discover Tampa
      • 50 Fun Things to Do in Tampa
      • Kid Friendly Fun
      • Things to Do in Tampa
      • Visit Tampa Bay -Nightlife
  • Why Use Us
    • Our Team
      • Cindy & Nick
    • Buying a Home
      • Buying a Home
      • Buyer's Consultation
      • Buyer’s Packet
      • Down Payment Program
      • Home Buying Tips
      • Home Buying Process
      • Mortgage Calculator
      • Videos for Buyers
    • Selling My House
      • Drone Videos
      • Featured Homes
      • Home Selling Process
      • Home Selling Tips
      • Increase the Value
      • Seller's Consultation
      • Videos for Sellers
      • What's It Worth?
    • Why Choose Us
      • Areas that We Cover
      • Client Testimonials
      • Market Reports
      • Monthly Item of Value
      • Our Track Record
      • Preferred Vendor List
      • YouTube Channel

Techniques for a Successful Laminate floor Install

September 24, 2016 by Nick & Cindy Davis

Intending to redo the floor in your home? Laminate flooring is relatively cheap, beautiful once complete, and easy to take care of. The installation is not difficult and can typically be finished in a day or two, depending on the size of the area you’re covering. With the necessary tools, a prepared floor, as well as a chunk of time to complete the job, new laminate flooring will be in your foreseeable future with this DIY project. Here are some ideas to get a professional finish.

Techniques for a Successful Laminate floor Install

Techniques for a Successful Laminate floor Install

1. Have a Clean Floor
Before installing any laminate flooring, it’s important to have a flat, clean surface (typically concrete) on which to install it. The base floor below the flooring that you pulled up has to be totally free of debris and gunk-such as wax, glue, or dirt-that could have been left behind from the old flooring. This will likely need to have a little extra preparation using a floor sander so that you can eliminate it. Also, ensure that there are no large cracks or holes in the concrete and that the floor is safe, sturdy, and strong. Sweep, mop, and clean up any dirt or debris from the floor and allow it to dry overnight before you begin. If the climate is humid and damp, you might want to put down a vapor barrier before any flooring is installed.

2. Adjust the Flooring to Room Temps
At least a few hours prior to deciding to install the laminate flooring, set the laminate in the room where it will be installed, if it isn’t being stored there already. This will give it a chance to adjust to the temperature of the room, as well the humidity. Some experts say it should sit overnight, so that it can swell and adjust to any temperature changes the room could possibly have regularly.

3. Use an Underlayment
Some types of laminate flooring include an underlay backing, which is what keeps the laminate in place. Should the flooring you selected does not, however, you will need to purchase new underlayment and put it down on your floor before installing the laminate. Since laminate flooring does not use glue or adhesive, this is usually a vital step.

4. A Saw Will be your Friend
A saw is a very necessary tool for laying your new flooring down. Without a good one, the job will be a lot more difficult. Ensure that you have all the necessary safety gear, including goggles and gloves, and to use the saw not only on the laminate flooring, but in addition to remove a small amount (about 1/16 of an inch) of your trim out from the bottom of the wall. Saw in a straight line parallel to the floor, to make room to tuck the laminate underneath the wall, instead of just pushing the edge against it. This tends to take some extra measuring, sawing, and line drawing, but will be worth it in the end. The laminate pieces will stay in place better and look beautiful.

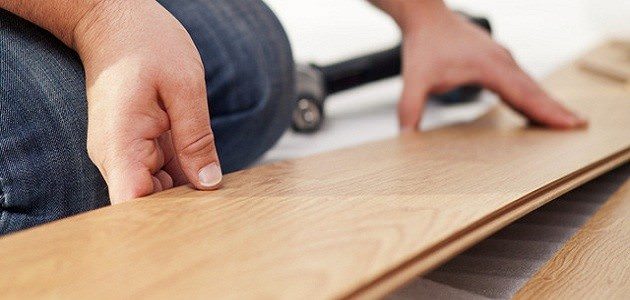
5. Seams Should be Spaced Apart
When installing the laminate, it needs to be laid in rows, and all seams ought to be spaced a minimum of 6 inches apart from the row adjacent to it, according to experts. Thus giving the floor a more natural, wooden look. Seams should not line up, nor should they be in any sort of pattern. Pieces smaller compared to one foot long should be saved and used along edges of the walls, as they can look odd in the middle of the floor.

6. Use Molding and Thresholds
To help hold the laminate flooring in place, keep your floor clean, and eliminate any gaps between the laminate flooring along with the wall, install thresholds and moulding that match the color of the flooring. They usually are simply installed along the edges with just a few nails and a hammer, and get rid of any spaces that remain. Additionally, they help wrap up the entire project and make it look professional.

Not too handy? Rather just purchase a home with all the things you want already in the home? Nick & Cindy Davis with RE/MAX Premier Group can assist you here in the Tampa Bay and Surrounding areas. We are always just a call to 813-300-7116 or click here away.

Filed Under: Advice, Buying a home, Buying A Home? Find A Local Expert To Help You, DIY, Home buyers, Home buying, Home features, Home improvements to increase value, Home Ownership, Nick & Cindy Davis, Nick and Cindy Davis, RE/MAX, Real Estate Tips, REALTOR, Remodeling, Tips, Updating a home Tagged With: How to install Laminate Flooring, Install Laminate Flooring, Techniques for a Successful Laminate floor Install

Footer

Serving Tampa Bay

Nick & Cindy Davis

“Team Davis”

813-300-7116

813-695-6475


RE/MAX Premier Group

With 2 Locations!

2915 Allegra Way

Lutz, FL 33559
&
6506 N Florida AVE

Tampa, FL 33604

Contact Us

Copyright © 2025 · Agent Focused Pro by Winning Agent · Log in